由于一些原因,需要重新部署一套k8s的测试环境。但是,又不想用二进制按照,之前使用二进制安装,各种脚本写的要吐。经过一些咨询,决定使用Kubeadm进行部署。
这里,我们就简单的使用1台master,1台Node进行测试。
环境配置
- centos8
- kubeadm 1.18.3
- calico1.14.2
1.更新系统
yum upgrade -y
2.关闭防火墙
systemctl stop firewalld
systemctl disable firewalld
3.关闭selinux
setenforce 0
sed -i 's/^SELINUX=enforcing$/SELINUX=permissive/' /etc/selinux/config
4.关闭swap
swapoff -a
sysctl -w vm.swappiness=0
sed -i 's/^UUID/#UUID/' /etc/fstab
5.网桥
cat <<EOF >  /etc/sysctl.d/k8s.conf
net.bridge.bridge-nf-call-ip6tables = 1
net.bridge.bridge-nf-call-iptables = 1
EOF
sysctl --system
6.安装socat
yum install socat -y
7.安装docker
yum install -y yum-utils device-mapper-persistent-data lvm2
yum-config-manager \
    --add-repo \ https://download.docker.com/linux/centos/docker-ce.repo
yum install docker-ce docker-ce-cli containerd.io -y
systemctl daemon-reload
systemctl enable docker
systemctl restart docker
如果遇到错:
错误:
问题: package docker-ce-3:19.03.12-3.el7.x86_64 requires containerd.io >= 1.2.2-3, but none of the providers can be installed
- cannot install the best candidate for the job
- package containerd.io-1.2.10-3.2.el7.x86_64 is filtered out by modular filtering
- package containerd.io-1.2.13-3.1.el7.x86_64 is filtered out by modular filtering
- package containerd.io-1.2.13-3.2.el7.x86_64 is filtered out by modular filtering
- package containerd.io-1.2.2-3.3.el7.x86_64 is filtered out by modular filtering
- package containerd.io-1.2.2-3.el7.x86_64 is filtered out by modular filtering
- package containerd.io-1.2.4-3.1.el7.x86_64 is filtered out by modular filtering
- package containerd.io-1.2.5-3.1.el7.x86_64 is filtered out by modular filtering
- package containerd.io-1.2.6-3.3.el7.x86_64 is filtered out by modular filtering
(尝试添加 '--skip-broken' 来跳过无法安装的软件包 或 '--nobest' 来不只使用最佳选择的软件包)
先执行执行
wget https://download.docker.com/linux/centos/7/x86_64/edge/Packages/containerd.io-1.2.6-3.3.el7.x86_64.rpm
yum install containerd.io-1.2.6-3.3.el7.x86_64.rpm -y
8.配置kubernets阿里云仓库
cat <<EOF > /etc/yum.repos.d/kubernetes.repo
[kubernetes]
name=Kubernetes
baseurl=https://mirrors.aliyun.com/kubernetes/yum/repos/kubernetes-el7-x86_64/
enabled=1
gpgcheck=1
repo_gpgcheck=1
gpgkey=[https://mirrors.aliyun.com/kubernetes/yum/doc/yum-key.gpg](https://mirrors.aliyun.com/kubernetes/yum/doc/yum-key.gpg) [https://mirrors.aliyun.com/kubernetes/yum/doc/rpm-package-key.gpg](https://mirrors.aliyun.com/kubernetes/yum/doc/rpm-package-key.gpg) EOF
9.安装kubet kubeadm
yum install -y kubelet-1.18.3-0 kubeadm-1.18.3-0 kubectl-1.18.3-0
systemctl enable kubelet
此处一定要指定版本!!!!由于未指定版本,使用的默认版本,导致非master节点下请求apiserver失败。比如,在calico-controller中遇到如下报错
2020-08-01 10:25:08.813 [ERROR][1] client.go 261: Error getting cluster information config ClusterInformation="default" error=Get https://10.96.0.1:443/apis/crd.projectcalico.org/v1/clusterinformations/default: context deadline exceeded2020-08-01 10:25:08.814 [FATAL][1] main.go 114: Failed to initialize Calico datastore error=Get https://10.254.0.1:443/apis/crd.projectcalico.org/v1/clusterinformations/default: context deadline exceeded
包括在dashboard 中也会遇到这个报错,这个问题,我们搞了两天也没搞定,最后还是通过排除的方法把各种可能性排除后才确定是由于install的Kubeadm和init的kubeadm版本不一致导致
10.初始化Kubeadm
kubeadm init --kubernetes-version=1.18.3  \
--image-repository=http://registry.aliyuncs.com/google_containers  \
--pod-network-cidr=192.168.0.0/16
由于网络组建用的是calico所以这里需要指定pod-network-cidr是192.168.0.0/16,如果设置其他的值,就需要在部署calico的时候,去把yaml中的 CALICO_IPV4POOL_CIDR 的默认值改掉。
mkdir -p $HOME/.kube
 sudo cp -i /etc/kubernetes/admin.conf $HOME/.kube/config
 sudo chown $(id -u):$(id -g) $HOME/.kube/config
You should now deploy a pod network to the cluster.
Run "kubectl apply -f [podnetwork].yaml" with one of the options listed at:
https://kubernetes.io/docs/concepts/cluster-administration/addons/
Then you can join any number of worker nodes by running the following on each as root:
kubeadm join 172.19.244.90:6443 --token vzh07k.k01t0tqf8zmmba4k \
--discovery-token-ca-cert-hash sha256:b9aa31bd013ed5bb4c34ae9340f2609a5632831b80f407f12c76b5d875122833
11.根据提示生成admin.conf
mkdir -p $HOME/.kube
sudo cp -i /etc/kubernetes/admin.conf $HOME/.kube/config
sudo chown $(id -u):$(id -g) $HOME/.kube/config
node节点可以用 kubeadm join加入
12.按照calico
kubectl apply -f https://ms-source.oss-cn-shanghai.aliyuncs.com/calico/yaml/calico-3.14.2.yaml
这个文件是拿的官方的yaml直接改了里面的image,阿里云下官方的速度还行,但是腾讯云下忙的很,如果不想用,可以直接用官方的
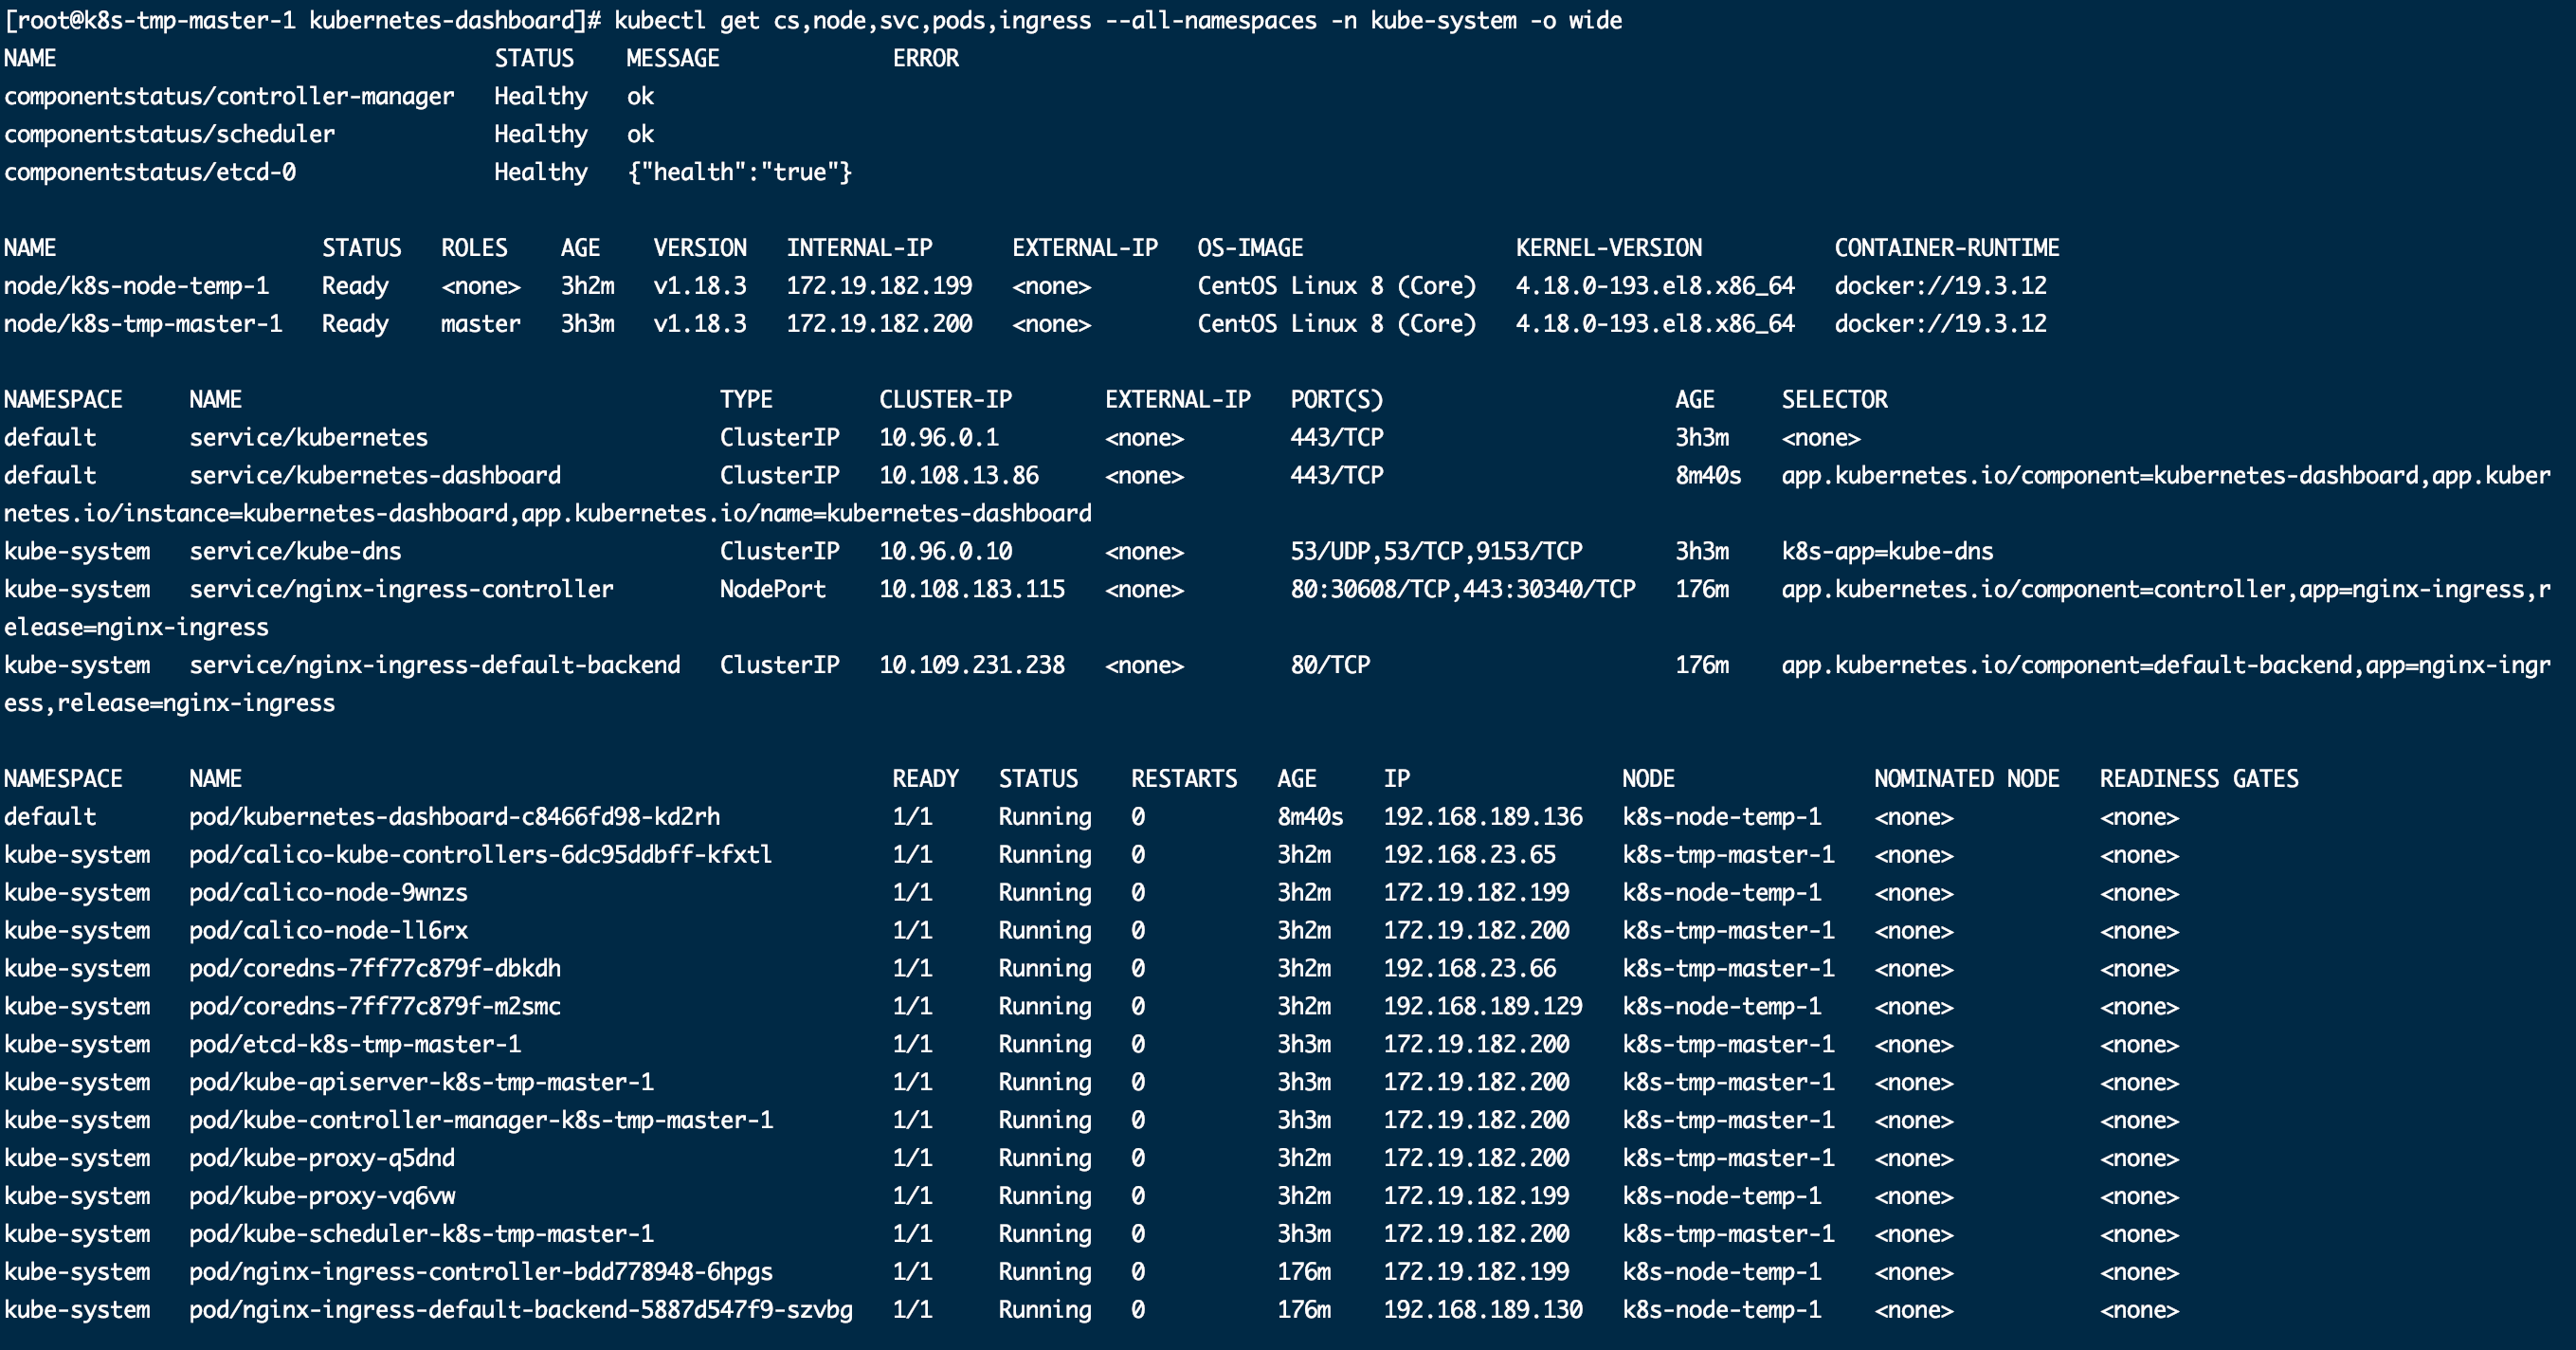
13.等一会之后,执行 kubectl get cs,node,svc,pods,ingress --all-namespaces -o wide 看下组件情况
14.安装ingress和kubernetes-dashboard
这里是用helm安装的,没什么特别,主要是 kubernetes-dashboard 目前helm/charts仓库的版本比较老,可以用这个地址 https://hub.kubeapps.com/charts/kubernetes-dashboard/kubernetes-dashboard
在ingress和dashboard 的部署上,我是自己做的定制,放到了git仓库,然后用jienkins部署的。
如果要定制的话,可以通过 helm repo add kubernetes-dashboard https://kubernetes.github.io/dashboard 加仓库地址,然后 执行 helm pull kubernetes-dashboard 下载到本地,会下载一个 tar.gz的压缩包,解压之后就是 charts的文件,自己根据需求修改即可
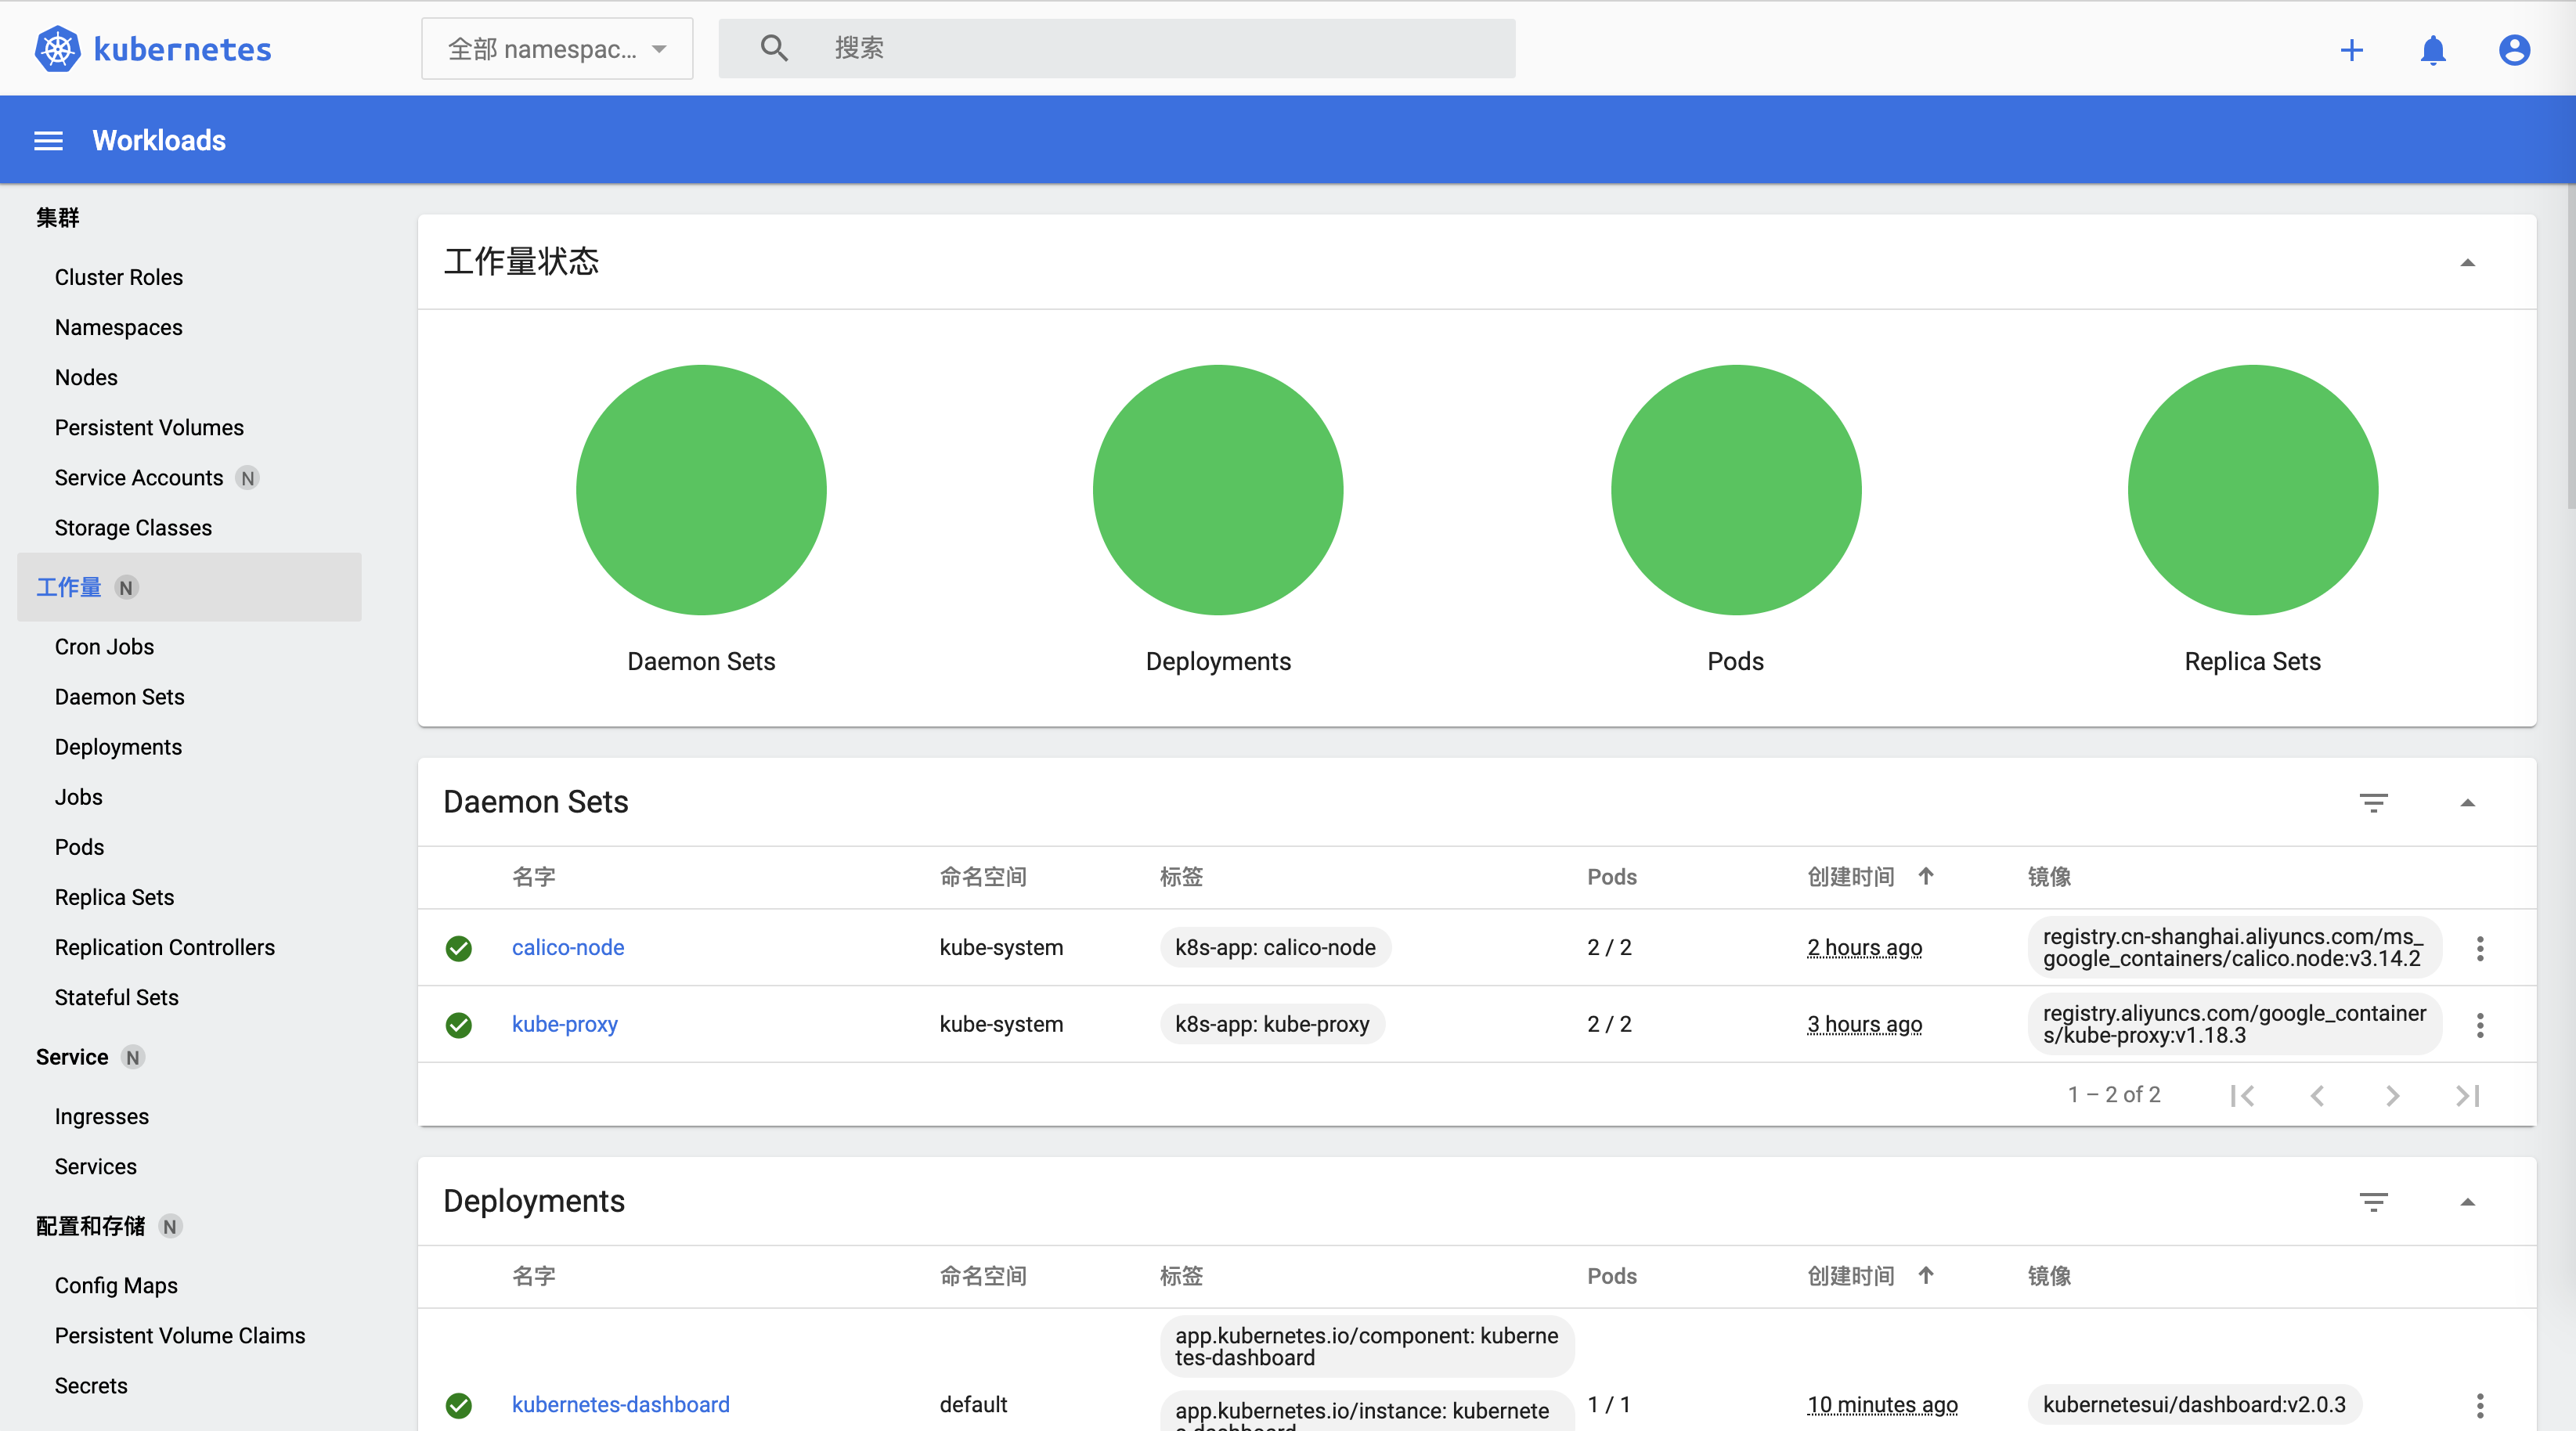
新版的image地址和版本改变都比较大,已经到2.0了。UI变化也蛮大的
15.几个补充,这里的部分没有在测试的时候使用。
重新生成加入join token
kubeadm token create --print-join-command
如果要加入多个master ,需要把 /etc/kubernetes下的文件复制到其他的master 节点下
在其他master执行,注意--experimental-control-plane参数
kubeadm join 10.31.90.200:8443 --token abcdef.0123456789abcdef --discovery-token-ca-cert-hash sha256:84201a329ec4388263e97303c6e4de50c2de2aa157a3b961cb8a6f325fadedb1 --experimental-control-plane
16.最后
这次安装折腾的够呛,网上找的文章就是那几个版本,很多问题解决不了。转载注明出处吧。