1.1 环境
1.2 软件准备
-
nginx 1.7.12.1 Lizard.zip:http://nginx-win.ecsds.eu/download/nginx%201.7.12.1%20Lizard.zip -
nginx-rtmp-module-1.2.2.zip:https://codeload.github.com/arut/nginx-rtmp-module/zip/refs/tags/v1.2.2 -
OBS(Open Broadcaster Software):https://obsproject.com/ -
VLC播放器:https://www.videolan.org/
1.3 安装步骤
1.3.1 解压文件nginx
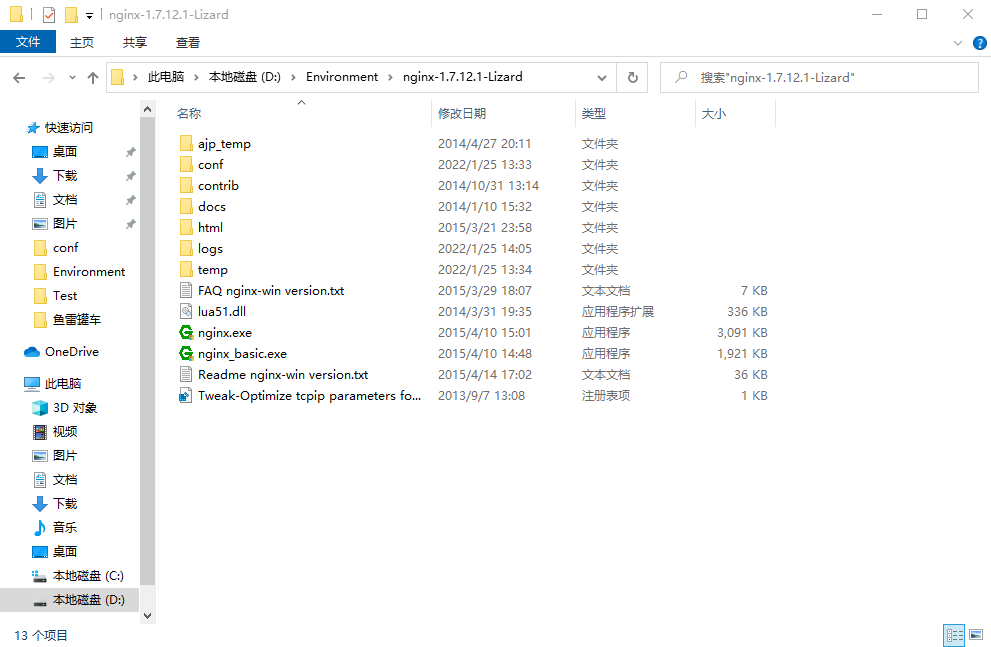
解压缩文件nginx 1.7.12.1 Lizard.zip至目录:D:\Environment\nginx-1.7.12.1-Lizard
1.3.2 配置nginx-rtmp-module
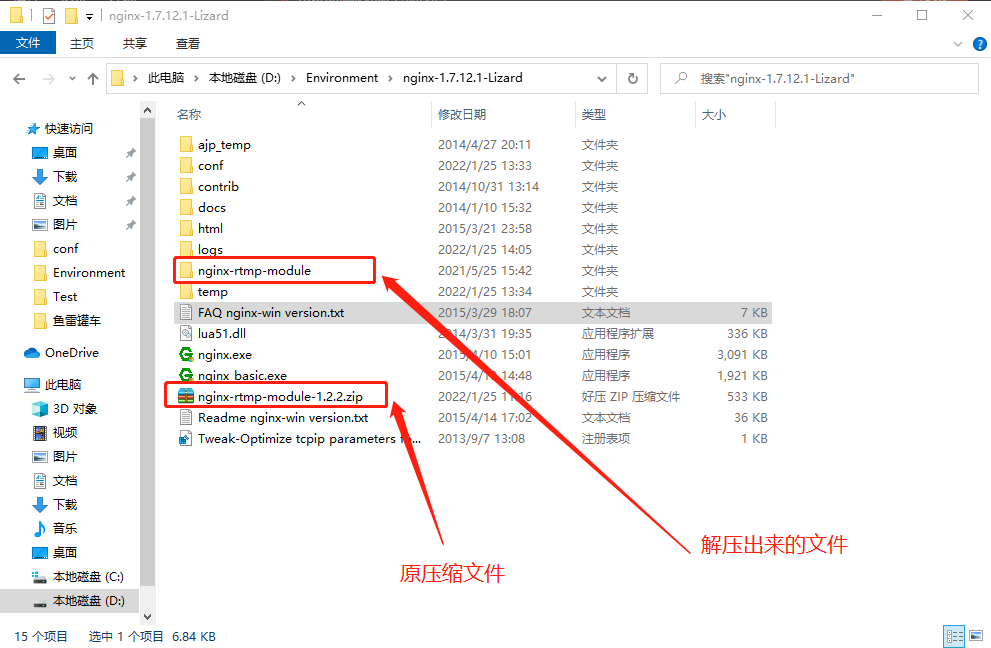
将文件nginx-rtmp-module-1.2.2.zip解压到目录D:\Environment\nginx-1.7.12.1-Lizard\下,并重命令解压出来的目录:从nginx-rtmp-module-1.2.2`改为`nginx-rtmp-module。
1.3.3 配置nginx
在目录D:\Environment\nginx-1.7.12.1-Lizard\conf下新增nginx配置文件:nginx.conf,配置内容如下:
#user nobody;
worker_processes 1;
#error_log logs/error.log;
#error_log logs/error.log notice;
#error_log logs/error.log info;
#pid logs/nginx.pid;
events {
worker_connections 1024;
}
rtmp_auto_push on;
#RTMP服务
rtmp {
server {
listen 1935;
ping 30s;
chunk_size 4096;
record all;
# TV mode: one publisher, many subscribers
application live {
live on;
}
# video on demand
application vod {
play /var/flvs;
}
application vod_http {
play http://localhost/vod;
}
application hls {
live on;
hls on;
hls_path /tmp/hls;
}
}
}
#HTTP服务
http {
include mime.types;
default_type application/octet-stream;
sendfile on;
keepalive_timeout 65;
server {
listen 80;
server_name localhost;
#location / {
# root html;
# index index.html index.htm;
#}
# Serve HLS fragments
location /hls {
types {
application/vnd.apple.mpegurl m3u8;
video/mp2t ts;
}
root /tmp;
add_header Cache-Control no-cache;
}
# Serve DASH fragments
location /dash {
root /tmp;
add_header Cache-Control no-cache;
}
location /live_hls {
types{
#m3u8 type设置
application/vnd.apple.mpegurl m3u8;
#ts分片文件设置
video/mp2t ts;
}
#指向访问m3u8文件目录
alias ./m3u8File;
add_header Cache-Control no-cache; #禁止缓存
}
location /stat {
rtmp_stat all;
rtmp_stat_stylesheet stat.xsl;
}
location /stat.xsl{
root ./nginx-rtmp-module;
}
location /control {
rtmp_control all;
}
# redirect server error pages to the static page /50x.html
#
error_page 500 502 503 504 /50x.html;
location = /50x.html {
root html;
}
}
}
1.3.4 验nginx配置文件
$ d:
$ cd D:\Environment\nginx-1.7.12.1-Lizard
$ nginx -t
1.3.5 启动nginx
使用cmd关键词打开windows的cmd命令面板:
$ d:
$ cd D:\Environment\nginx-1.7.12.1-Lizard
# 启动nginx
$ start nginx
#命令说明
#查看帮助
$ nginx -h
# 启动nginx
$ start nginx
# 关闭nginx
$ nginx -s stop
# 重新加载nginx的配置文件(类似重启)
$ nginx -s reload
1.3.6 验证nginx
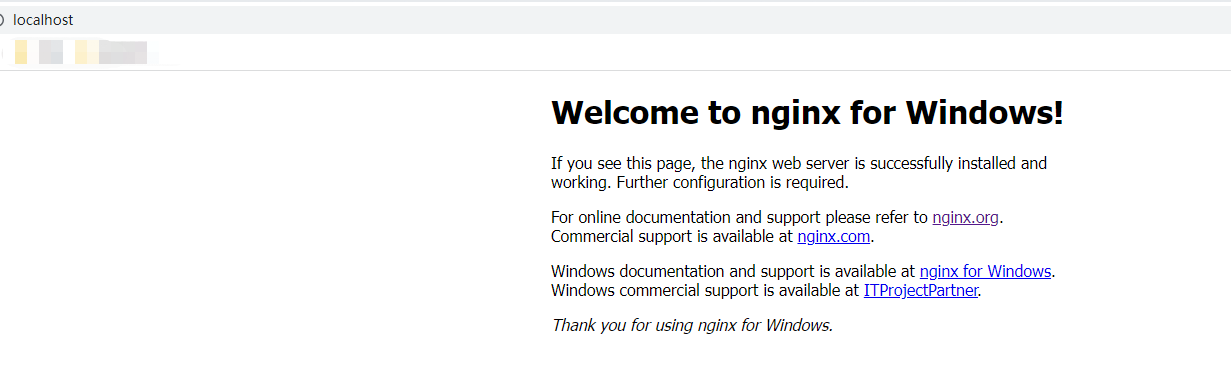
在浏览器输入:http://localhost/,查看nginx是否启动成功
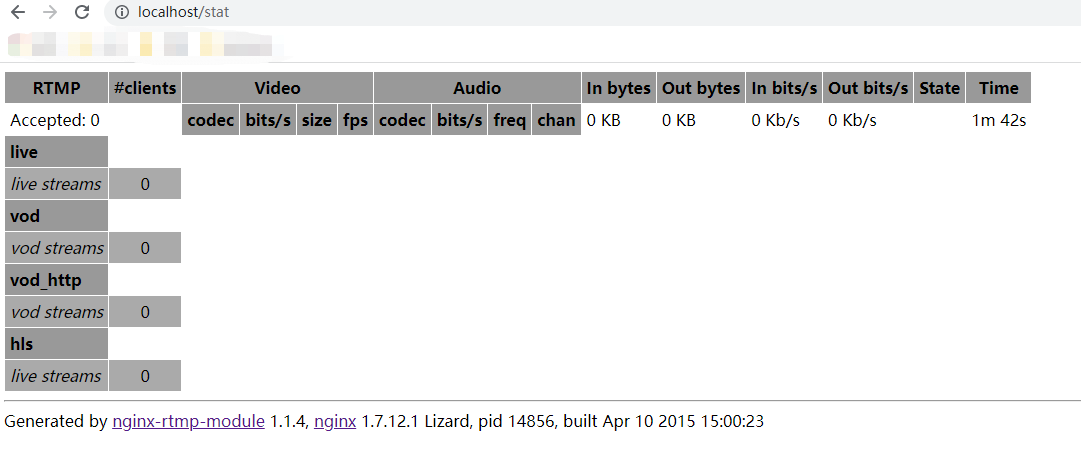
在浏览器输入:http://localhost/stat,查看媒体流服务的情况
1.3.7 推流
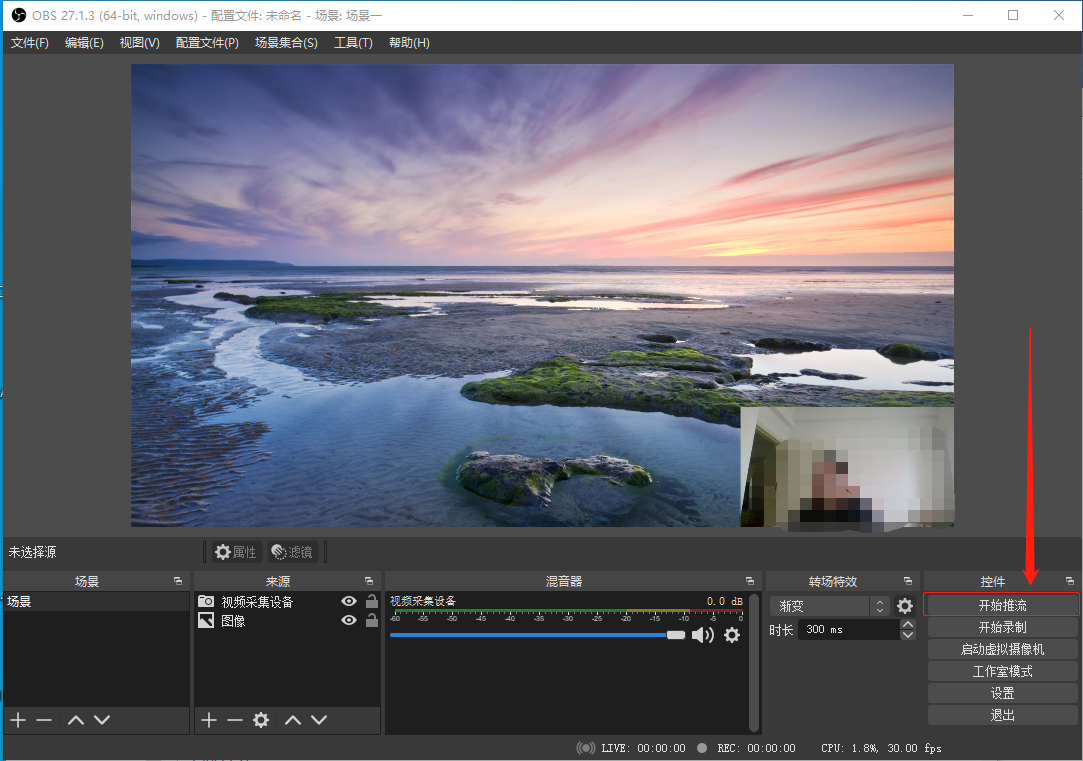
安装OBS,打开此软件,创建一个场景:

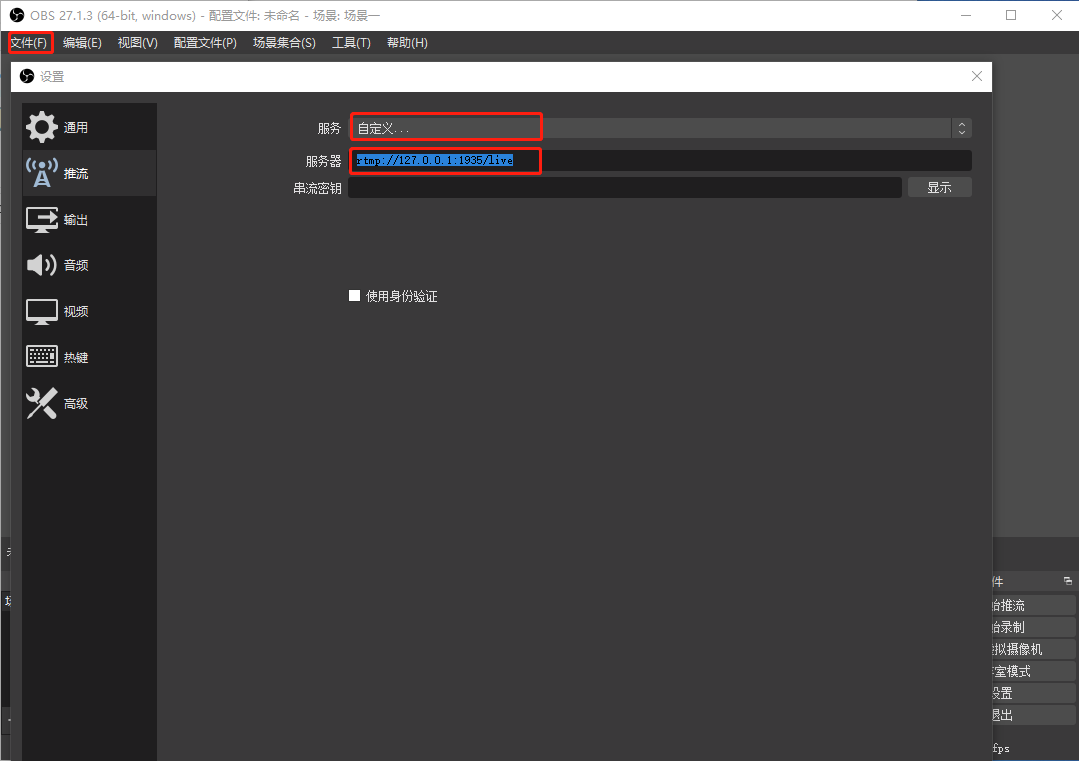
设置推流的地址:
文件==》设置==》推流;地址格式形如:rtmp://ip:port/live
点击【开始推流】,就会开始推流了(nginx记得开启哇)。
1.3.8 拉流
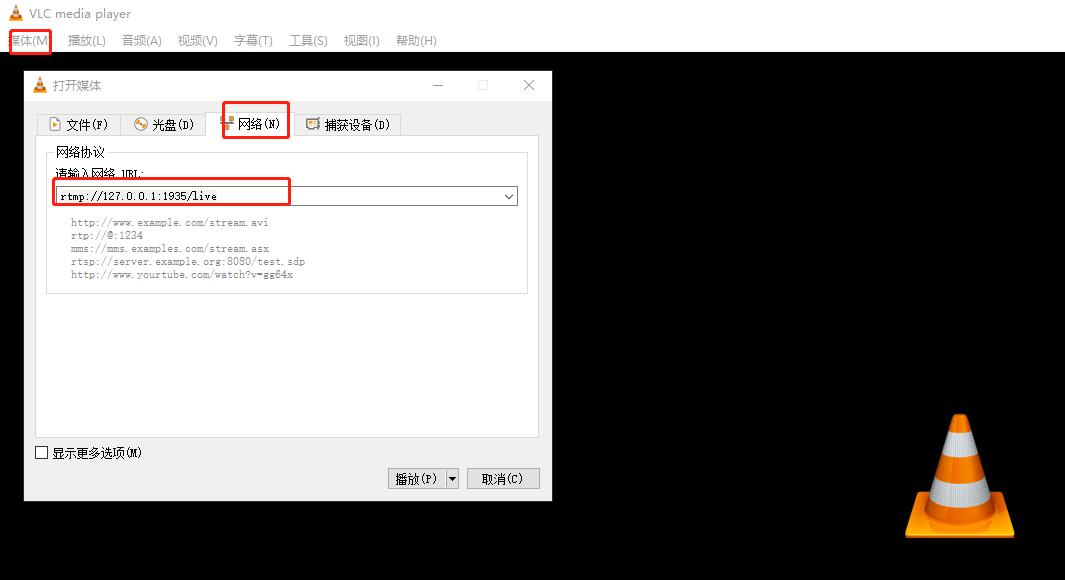
安装VLC播放器,并打开软件。
左上角媒体==》打开网络串流==》网络,配置URL(格式形如:rtmp://ip:port/live):rtmp://127.0.0.1:1935/live
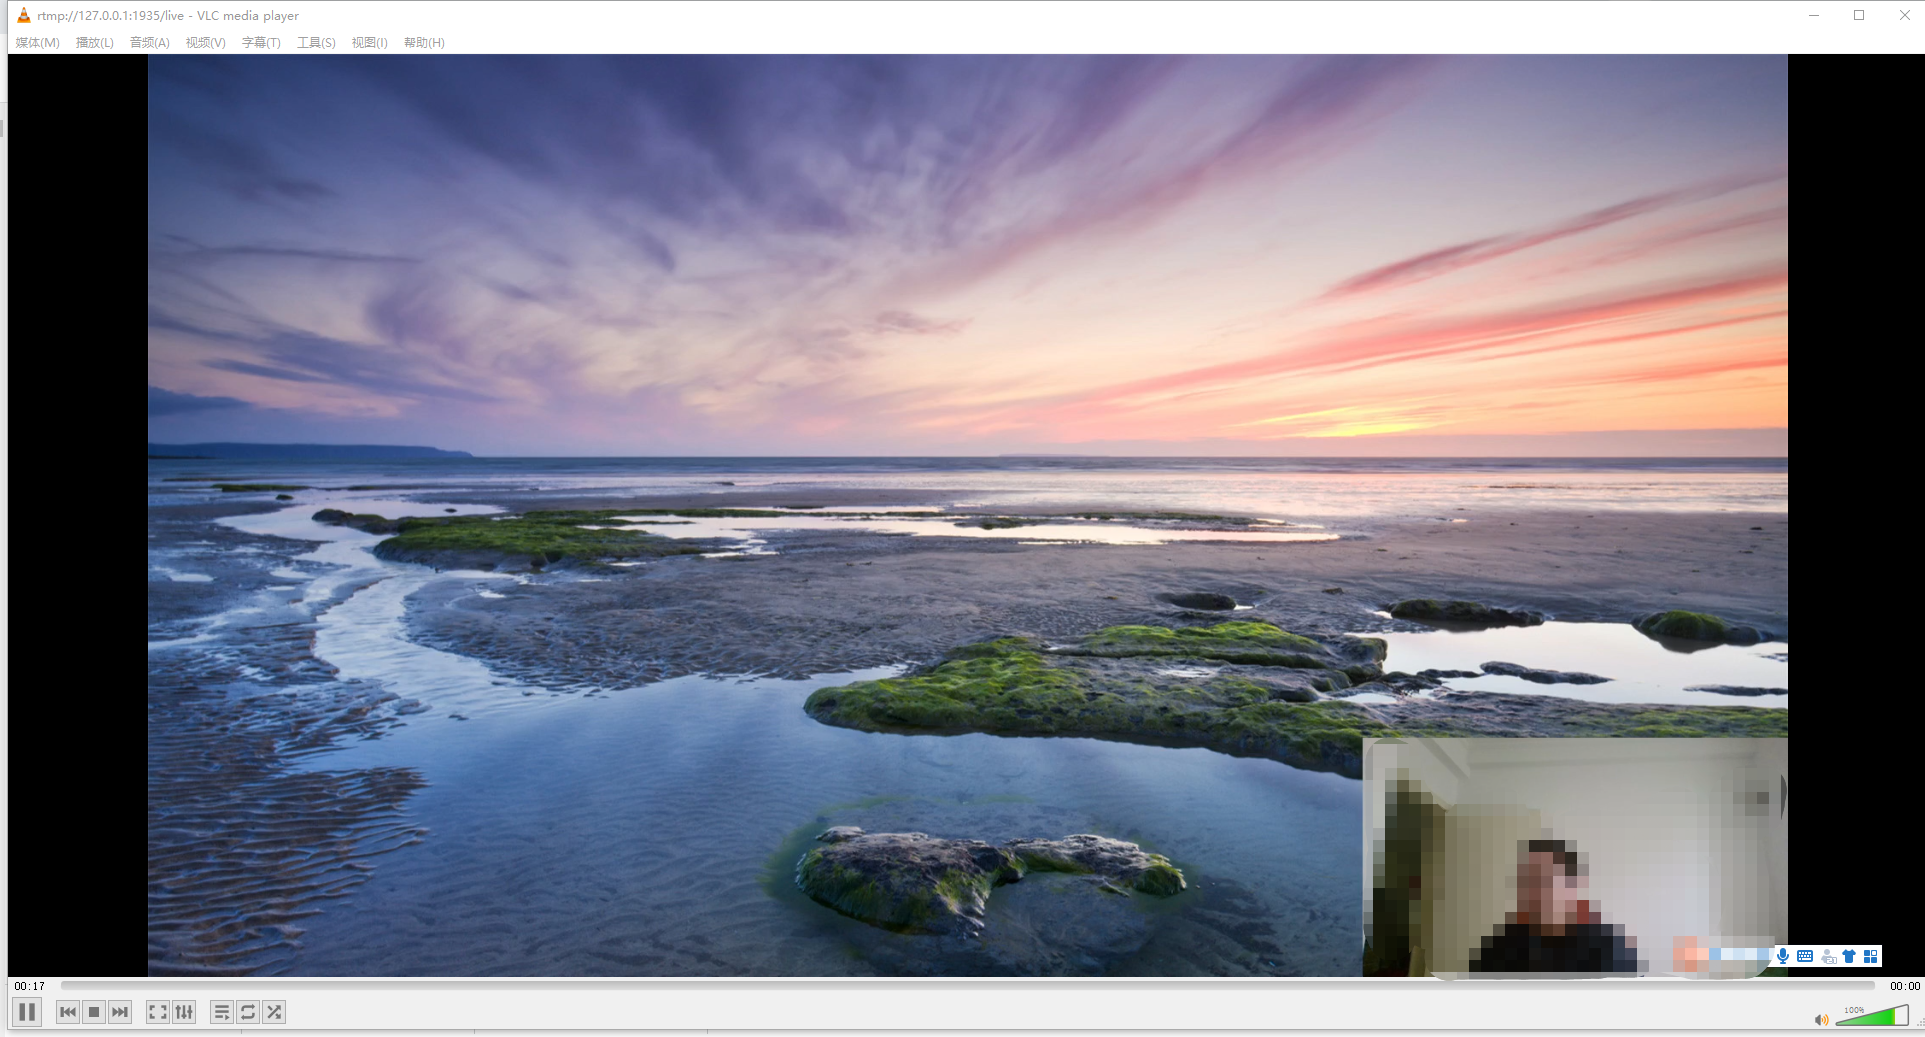
点击播放,验证是否成功拉到了流。
1.3.9 nginx控制台验证
可以再看一下nginx的控制台显示的流的情况

1.4 遇到的问题
1.4.1 nginx.conf配置文件验证错误:无法发现指定文件目录
如果在执行nginx -t验证配置文件时报错信息如下:
nginx: [emerg] CreateDirectory() "/tmp/hls" failed (3: The system cannot find the path specified)
我安装的nginx在D盘,你可以尝试在D盘下创建目录,然后再尝试再次验证配置文件。
1.5 总结
本文基于Windows环境下搭建的nginx流媒体服务器,初步实现了推流和拉流的操作。
本文如果错误,欢迎交流指正。